One of the keys to successful product photography is using a large light source even with very small objects. Here is a post where I discuss the benefits of large lighting with a fellow photographer, with examples, in 2013.
Color 3D Scanning is a form of photography in that in addition to the distance scanner a digital camera is used to capture the 'material' to be overlaid onto the shape. It, too, can benefit from a large light source. But, in most cases, especially when we want to go portable, that is not a viable option. So, we must search for alternatives.
ORANGEMONKIE HALO-BAR LIGHTS
Let me begin by first saying this. I love OrangeMonkie products. In the 3D ThinkLink Lab we have 3 different sizes of Foldio lightboxes (Foldio1, Foldio2 and Foldio3) along with the marvelous Foldio360 turn table used to capture this 2300 year-old Apulian vase.
I became aquainted with the Halo-Bar lights because they were included with the Foldio3 with Foldio360 package. At the time of that purchase they were only available with the Foldio3. But, recently, they have been offered for sale at $59 as a standalone lighting package.
 |
| OrangeMonkie Halo-Bar Lighting Kit |
The nice thing about these lights is that they come with a dimming system that allows very nice control. This makes them very desirable even outside of the typical Foldio lightbox applications. In fact, I've found them to be highly effective for with 3D scanners. And, in particular, the Matter and Form scanner, which has become my favorite.
Halo-bar lights are small and portable, which adds to their value to be used with an equally portable 3D scanning system. And, for most objects they work fine just as they are. But, some highly specular objects present special lighting challenges requiring a bigger light footprint.
Thus, began a quest to see if I could find a way to make some small portable lights perform like a MUCH bigger light source.
MAKING SMALL LIGHTS BIGGER
One of the benefits of being older is that memories of past solutions can be very helpful for the present. In the late 1960's I sold audio-visual equipment and among the most popular items in the days of multi-projector slide presentations was the lenticular screen that was considerably brighter than the beaded projection screens of the time. Remembering this, it seems like experimenting with lenticular lenses might provide the means for making a small light seem bigger. Here is why.
A LENTICULAR LENS is actually series of cylindrical lenses molded into a plastic sheet. It looks like this when magnified.
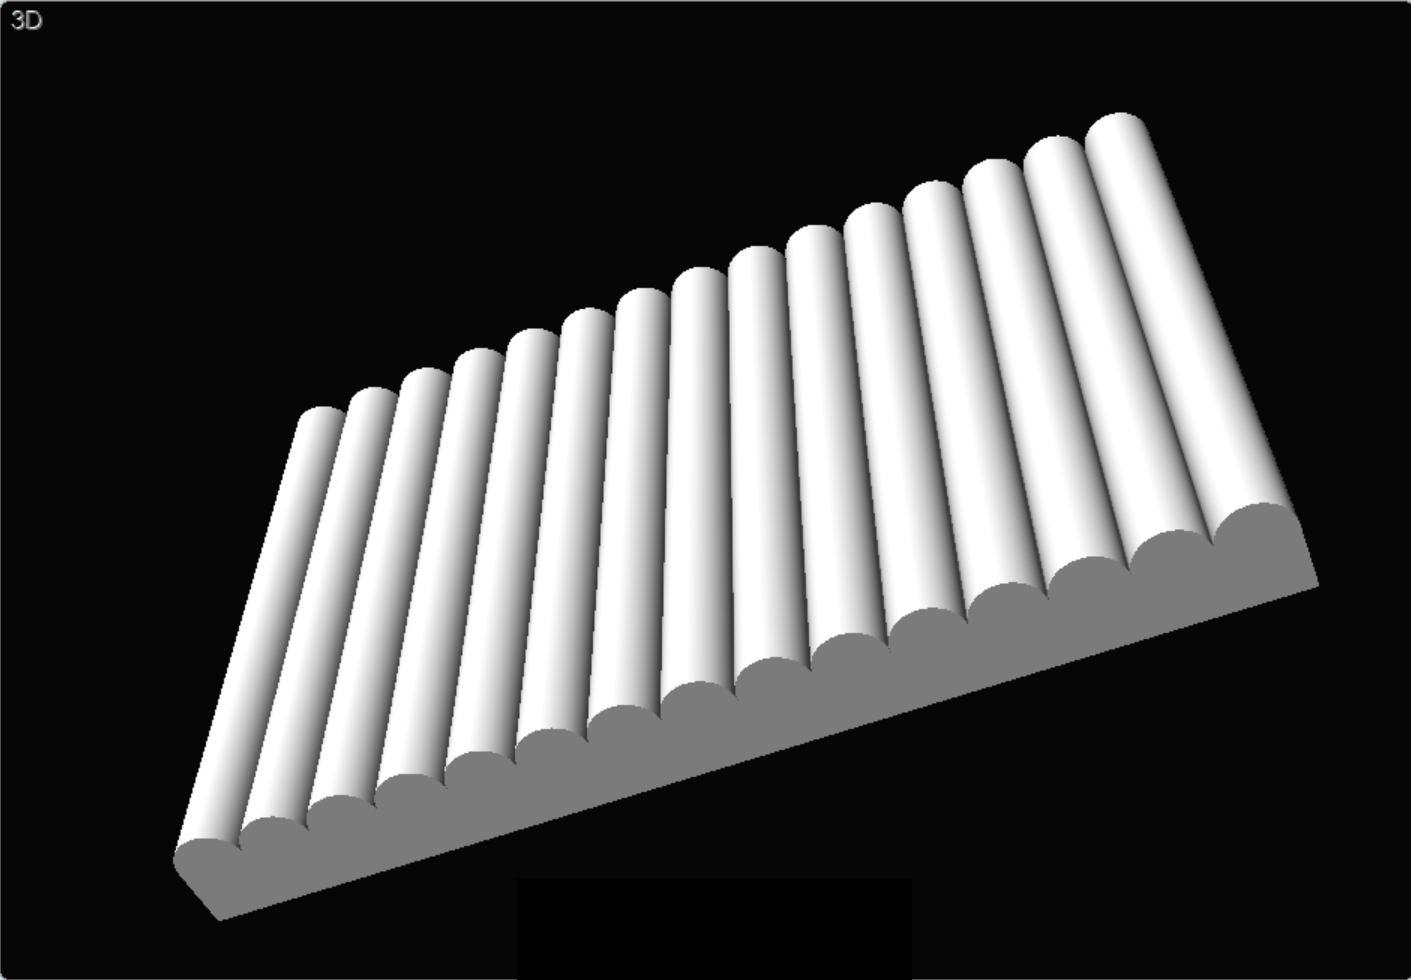 |
| Illustration of a Lenticular Lens |
The purpose of the lenses is to redistribute the path of light waves as they pass through the lens in a controlled direction as in this illustration.
 |
| Altered Light Wave Pattern |
In theory, I was hoping that the narrow light of the Halo-Bar would be broadened and flattened by a lenticular lens. So, I decided it was worth spending some time to experiment. I am happy to say it worked!
The orginal light pattern of the Halo-bar light looks like this:
 |
| OrangeMonkie Halo-Bar Light |
The diffusion is actually quite effective just as it is. But, it is still a small, somewhat concentrated light source. Adding a lenticular lens in the vertical direction has this result.
 | |
| Adding a Lentucular Lens Oriented Vertically |
The moire pattern is due to the angle of my camera relative to the lens, so please ignore it. The important thing to notice is that the narrow light is now MUCH wider! But, we can do even better!
 |
| Adding a Second Lenticular lens in the Horizontal Orientation |
We can add a SECOND lenticular lens that is rotated 90 degrees relative to the first. This scatters the light resulting in a much smoother pattern! How smooth largely depends on the distance of the light from the first lenticular lens.
We can smooth even further by adding a third diffusion layer. In this case simple white paper.

As is evident, the final result is a light source that is much larger and smoother than the original. The Matter and Form scanner for which this lighting modifier was created doesn't require a lot of light so the fact that the final result is not as bright as the original unfiltered Halo-Bar light is not a problem at all.
3D PRINTING AND THIS PROJECT
The 14"x20" lenticular sheets are available on Amazon. Five sheets are just under $25 with shipping. The frame to build the diffusion system was created using Moment of Inspiration. Basically, there is a top and bottom rail with slots that take the three levels of diffusion. The image below shows the bottom rail frame and the legs that rails that raise the frame to the level of the rotating platform on the Matter and Form scanner. The top rail mirrors the shape of the bottom and the sheets simply slide into the top and anchor in the bottom.
 |
| MOI3D Diffusion Frame Design |
The reason for the curvature has to do with the fact that the Matter and Form scanner has a turntable. I wanted a light source that wrapped around the rotating object. It takes about 10 hours to complete all the 3D printed parts on a 220mm x 220mm printer. The Halo-bar shape lends itself very well to 3D printed stands that are adaptable to any height.
 |
| 3D Printed Halo-bar light stand |
 |
| Halo-bar and Diffusion on Stands |
I like the result so much that I have ordered two more Halo-Bar lights to see if I can improve the lighting even further from a 3rd direction (front).
Above is the first attempt to use the new diffusers. We are getting there; but, more experimentation must be done. But, for now, I can say that this has been a fascinating project and I have really enjoyed learning to use the lenticular material and adding that capability to our capture arsenal.
 |
| Matter and Form 3D Capture Screen Shot |
Above is the first attempt to use the new diffusers. We are getting there; but, more experimentation must be done. But, for now, I can say that this has been a fascinating project and I have really enjoyed learning to use the lenticular material and adding that capability to our capture arsenal.
No comments:
Post a Comment