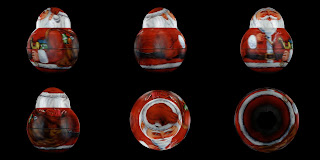
At first, i thought I could solve the overly bright issues in some areas by a simple color replacement. I was sweating bullets when I realized that the Color Replacement Tool in Affinity ALWAYS respects the underlying brightness value. This great for changing a shirt from one color to another because the features like folds and shadows remain. But, it is NOT so great when you want to turn bright red to darker red.
Fortunately, I enrolled in the free "Magically Remove Shadows" online course. It turns out that the process of removing shadows can be helpful in reducing glare as well. My stab at it isn't perfect. But, it DOES show me that I'm on the right track and that my gut feeling that Affinity Photo is the right tool for the job has been validated.
So, lets compare the BEFORE and AFTER. First the FRONT view.
 |
| Santa Front - Before Editing Mesh in Affinity |
 | |
| Santa Front - After Editing Mesh in Affinity |
Now for the BACK view.
 |
| Santa Back - Before Editing Mesh in Affinity Photo |
 |
| Santa Back - After Editing Mesh in Affinity Photo |
The great thing is that like MF Studio and the Matter and form scanner, we can go back into an Affinity Photo project and refine it. But, even at this stage I think that the concept of improving color captures by editing a mesh in a photo image application has been well demonstrated.
Lastly, here is a comparison of the two mesh files.followed by BevelPix links where you can see the objects in full 3D.
 |
| Santa Mesh File - Before Editing Mesh in Affinity Photo |
 |
| Santa Mesh File - After Editing Mesh in Affinity Photo |
https://bevelpix.com/creations/5e153984761dfe666220896d
https://bevelpix.com/creations/5e23711c1265aed1ecc4ed8c
The takeaway from this post is that capturing does not have to be, nor should it be, a one-step process. Learning to take advantage of other tools to create an improvement WORKFLOW is an important skill to use.
No comments:
Post a Comment